Adding new products in WooCommerce is much easier if you are familiar with blogging and WordPress. However, if this is your first time to use WordPress it could be somewhat complicated specially at first glance.
The WooCommerce team has posted a complete guide about “Adding and Managing Products” but still it could be a little confusing for first time users.
For this reason, here’s an illustrated tutorial that you can refer to as you create your first product post. Once you get familiarized with the product creation interface, I’m sure you’ll get addicted to adding more products. 🙂
WooCommerce has 4 product types but for this guide we’ll cover one of the most commonly used types: simple product.
Before everything else, you need to login to your WordPress dashboard first. If you are completely new to WordPress, here’s a quick guide: How to Log-in to Your WordPress Admin Panel
For Gold Members, you may want to watch this video: How to Add Product to WooCommerce Store
How to Add a Simple Product
1. Open a New Product page.
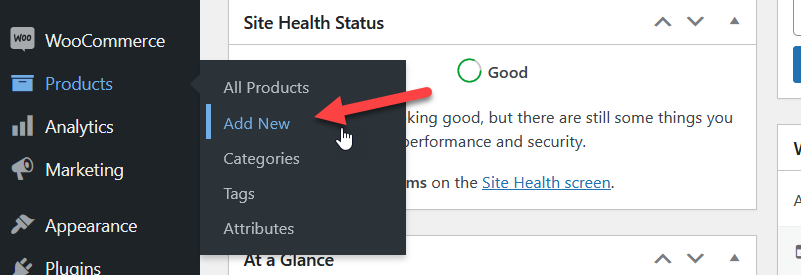
Find the “Products” menu item. Hover your mouse over it then click the submenu “Add New“.
2. Add Product Title
Enter the name of the product in the title field.

3. Add Product Description
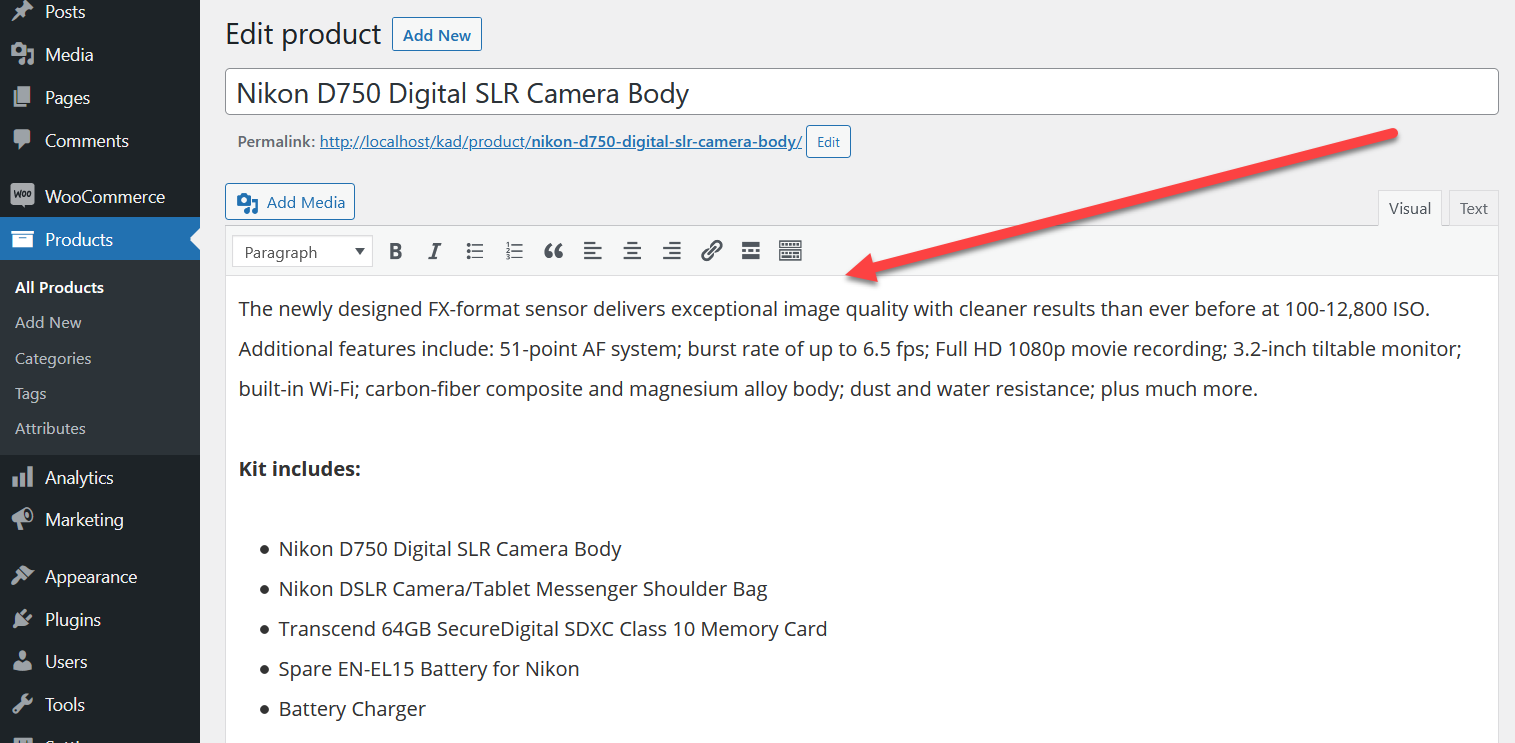
Write the description for your product. This section allows you to write a much longer description. Here, you would want to explain the advantages of your product. You can even use bullet points to improve the readability of this section.
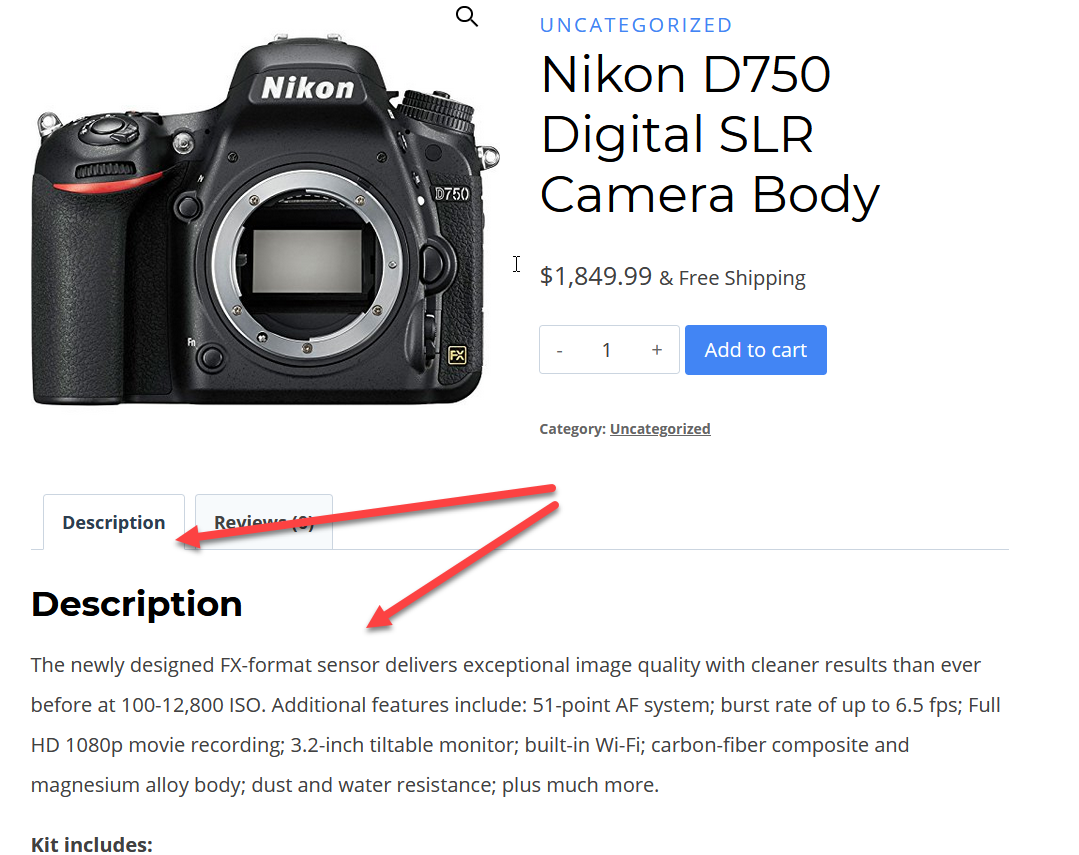
NOTE: This section is displayed under the Description tab just below the product image.
4. Add Product Main Image
This is where you should upload your product’s main image. This will be the largest image on the single product page and will also appear on the catalog page.
Product image size should be at least 400pixels.
Click the “Set product image” link to upload an image.

Here’s what it looks like when a new image is uploaded.

NOTE: The “Product image” meta box is usually located on the sidebar (right side of screen). This meta box is movable, meaning you can place it just below the product title and description section. See screenshot below:

5. Set the Product Type
The “Simple product” type is the default. This type of product is common among WoCommerce store owners. If you want to post a variable product, just click the Product data tab to bring out the drop down menu.

6. Fill out the product data meta box
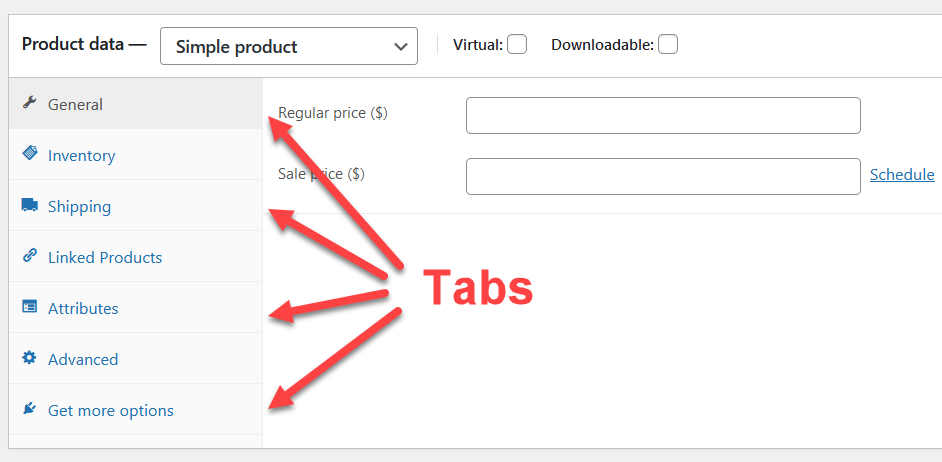
After selecting your product type, you’ll need to fill out the rest of the details in the Product data box. You can use the tabs on the left to navigate between different sections.
General tab

Under the General tab, enter the price for regular and sale price.
The sale price is for when you want to run a discount campaign. Otherwise, shoppers will see the regular price.
Below that, select the tax status – whether or not the product is taxable. If yes, select the tax class.
Inventory tab
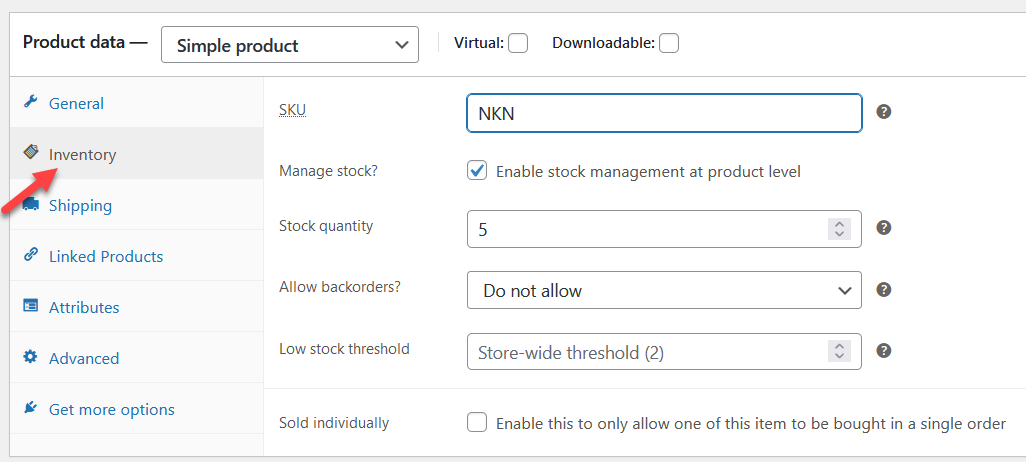
The Inventory tab helps you effectively manage stock.
So basically, here’s what you should do here:
- Enter product SKU. SKU is a unique identification number available on every product or service. This keeps the products distinctive and simplifies inventory management.
- Check “Enable stock management on product level“? This will automatically show available stock to your customers.
- Enter the number of pieces available in the stock quantity.
- Allow back orders if the product is being manufactured and will be available soon.
- Set the low stock threshold to 2, for example. It will notify you when the product’s stock goes below the threshold.
Shipping tab

Here, you can set important details about a physical product for shipping.
Enter the weight of the product and its dimensions.
There’s an option called shipping class. Shipping rates vary due to weight, service type, and other reasons. The shipping class group the products based on weight limits.
Linked products tab
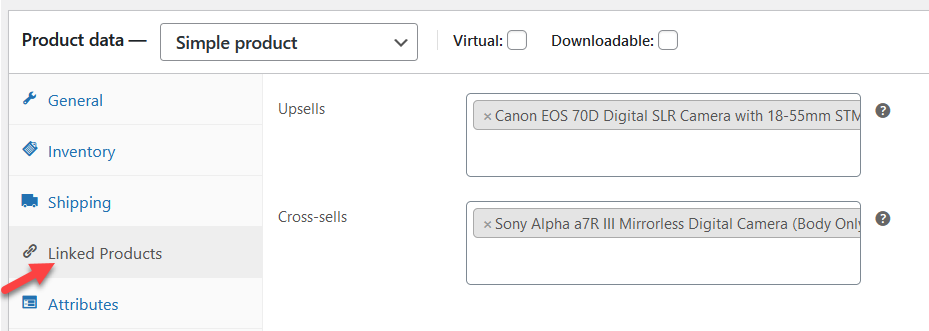
You can take advantage of this cool feature, if you want to improve shop revenue. As you can see, there are two ways to recommend more products to your customers: 1) Upsells and 2) Cross-sells.
Upsells – add more products with better features. Usually displayed on checkout page.
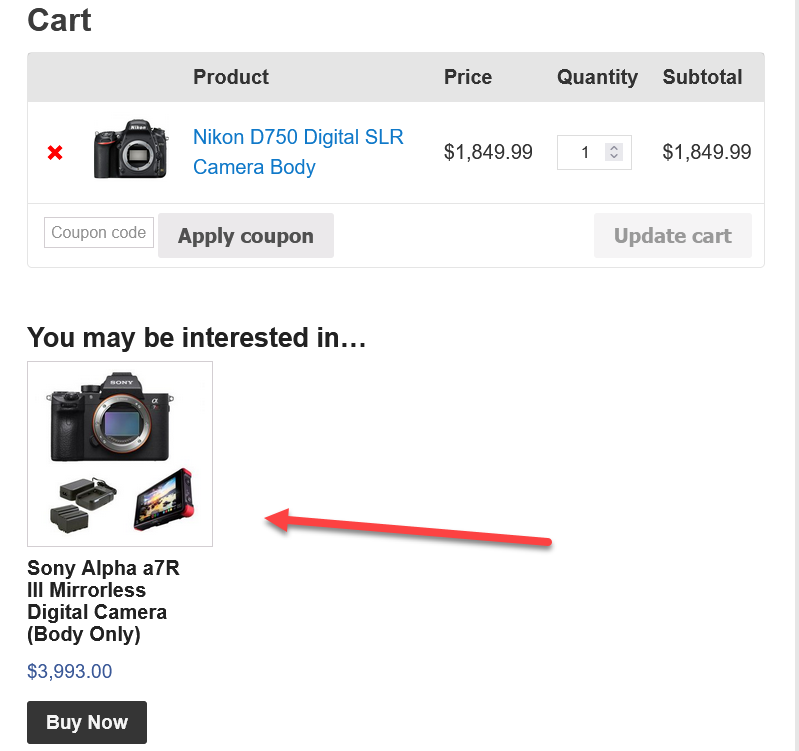
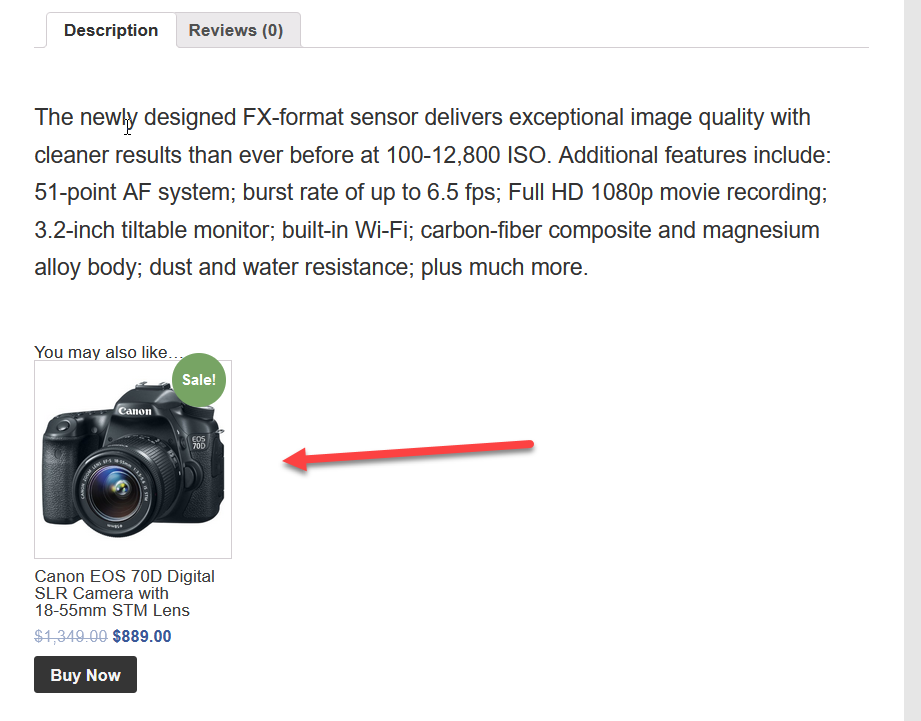
Cross-sells – recommend related products that the customer might be interested in. Usually displayed on product page.
Attributes tab
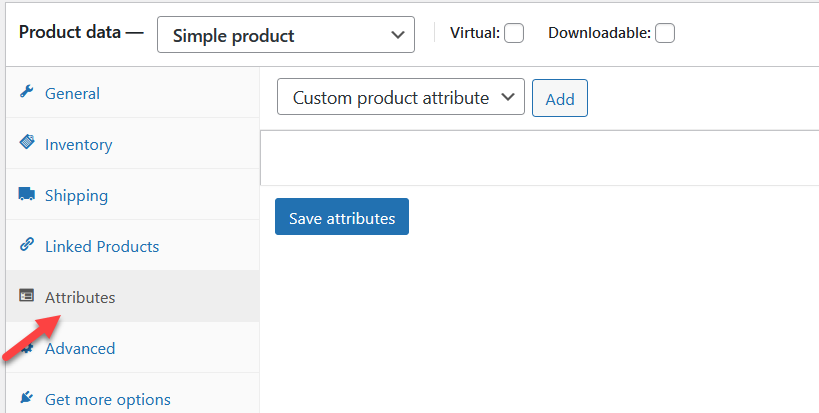
Use the attributes tab if you are publishing products with various options like color options, sizes, and more.
So, just skip this tab if you are posting a simple product.
Advanced tab
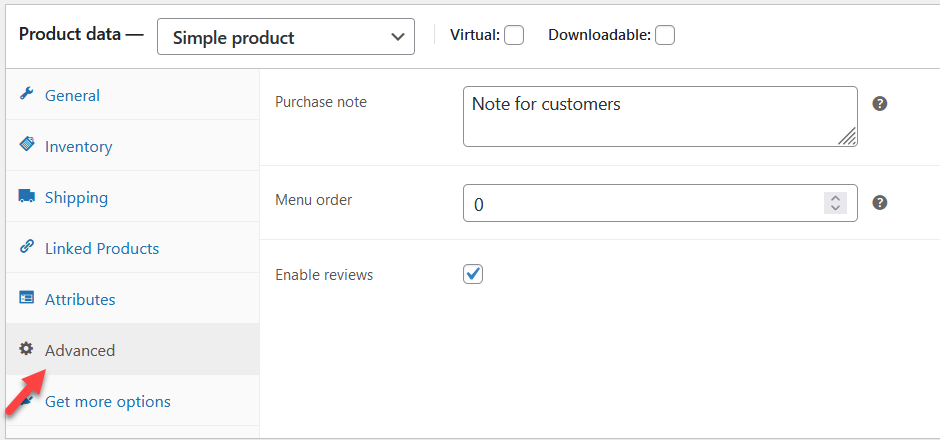
The Advanced tab can be used for adding a purchase note that is shown to the customer after placing an order.
7. Write an engaging short description
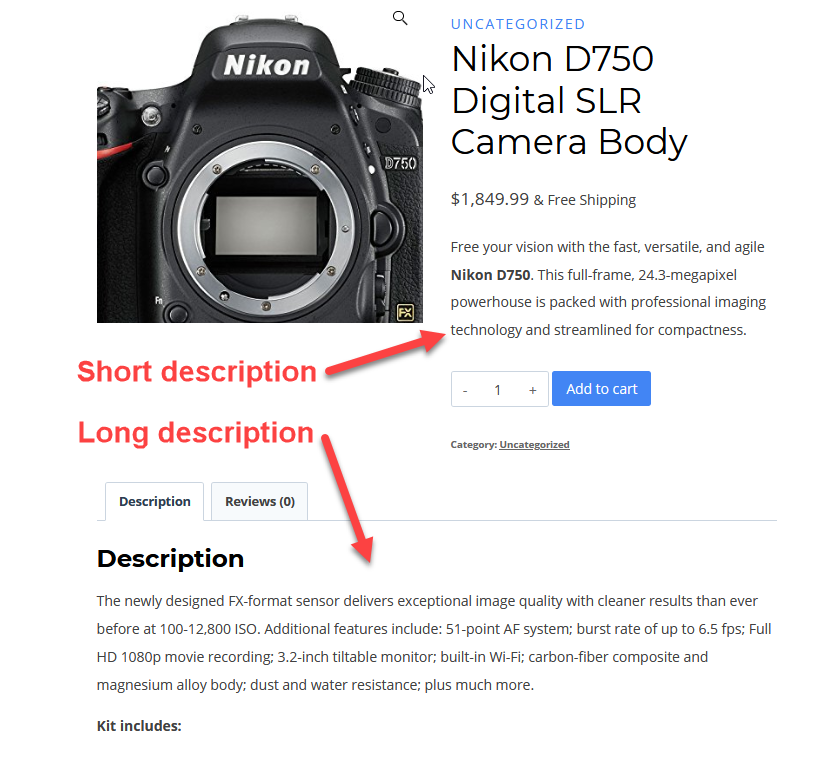
After filling out the Product data meta box, scroll down a little to the Product short description meta box and write an appealing description.

The short description usually appears at a prominent spot on your single product page. Write at least 2-3 sentences for this. This is picked up more often by the search engine and so this is essential for your WooCommerce store’s SEO.
The longer description that you entered on step 3 is normally displayed further down, though it depends on your WooCommerce theme.
8. Add product categories and tags
Categories and tags help you organize products. Your customers will also be able to use categories and tags to quickly search products.
Categories. You can either check existing categories that match your product or create a new one.
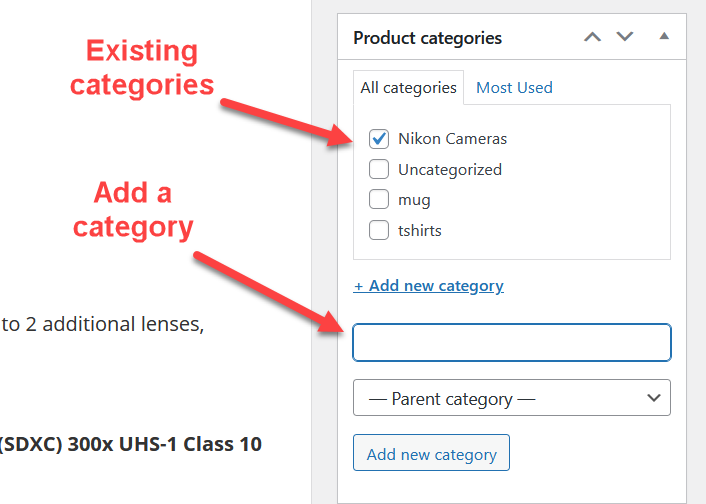
When adding new categories, try to make them logical and useful for your target customers.
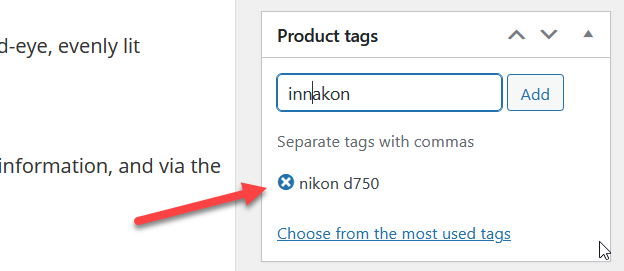
Tags. Add product tags if you wish. Tags can be more specific. You can target the exact brand for example.
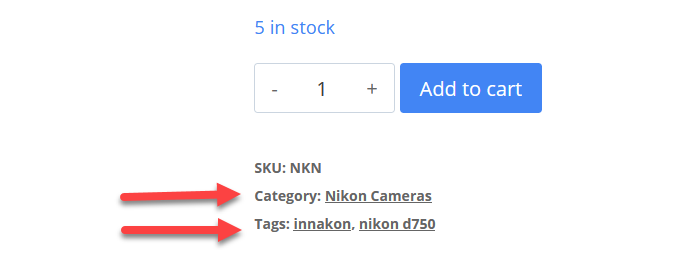
Now, this is how categories and tags are displayed on the front-end of your product page. Keep in mind though that the visibility for this is dependent on your WordPress theme.
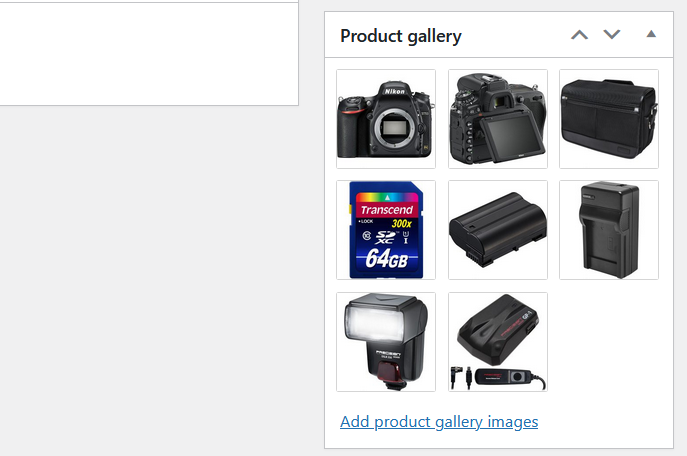
9. Add a product gallery
You can add supporting product images using the product gallery meta box.
This is how the product gallery is displayed on the front-end.

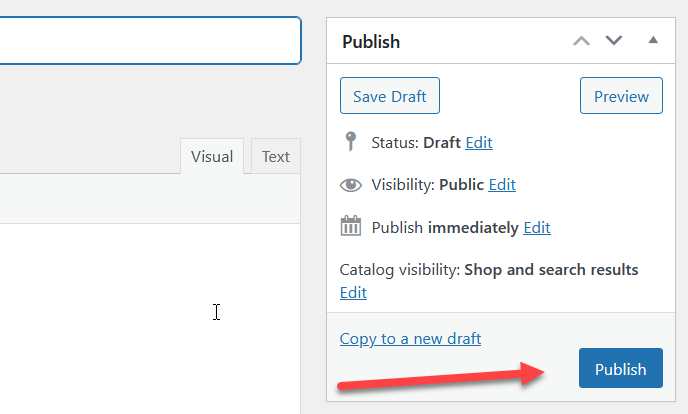
10. Hit the publish button
Double-check all of the product details and if all is right then just click the “Publish” button. You can find the publish box on the top right side of your screen.
That’s it.
Tip: Once you have set up a product, you can use the same template for the next one. Just use the “Copy to a new draft” link below the publish box.

