1. Log in to your cPanel account using this url format:
http://yourdomain.com/cpanel

2. On the cPanel dashboard find the “MySQL Database Wizard” button.

3. Click the “MySQL Database Wizard” button and you will be redirected to the “MySQL® Database Wizard“

4. Enter a database name then click “Next Step” button.

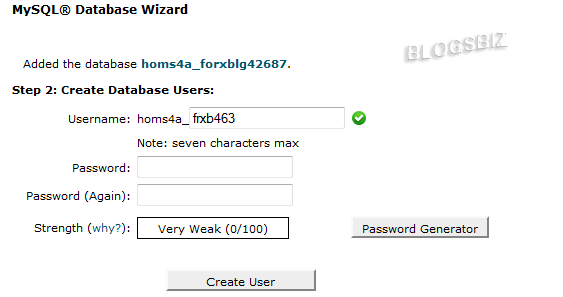
Tip: Your database name should be something that will allow you to recognize it from other databases especially if you have already created or planning to create more databases in your webhost account.
For example: forxblg42687 as shown above.
Notice also how I can freely choose my own secure not easy to guess database name and username.
5. Enter database username. Up to 7 characters is allowed.

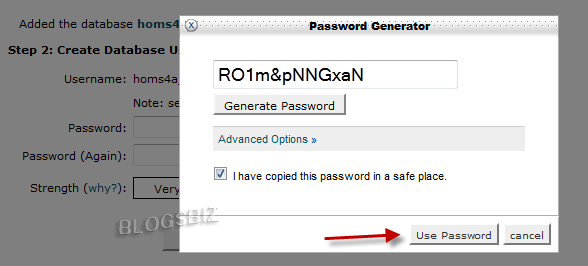
6. Generate a database password by clicking the “Password Generator button” then click “Use Password” button.

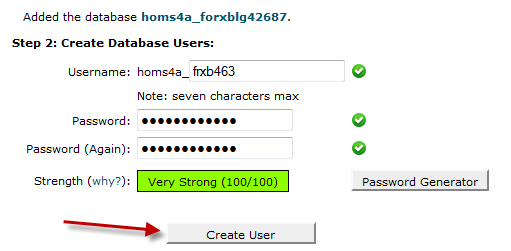
7. Click “Create User” button.

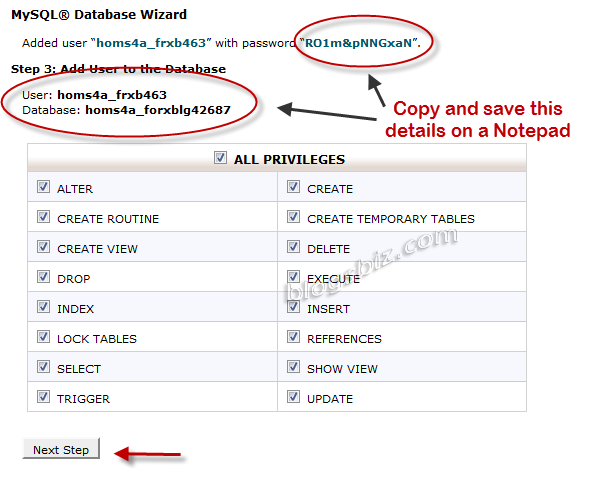
8. Now copy and save your new database info into a notepad. You will be using this when installing WordPress on Part 3. of manual installation.

For this example your database detail should be:
Database Name: homs4a_forxblg42687
Database Username: homs4a_frxb463
Password: RO1m&pNNGxaN
9. Now, tick (check) the box beside “ALL PRIVILEGES“. This should automatically check all fields under it.
10. Finally, click the “Next Step” button (as shown by red arrow on above image).

That’s it. You have successfully created a MSQL database complete with name, user, and password.
