Categories allow you to organize your posts into topics or groups of related content so that your visitors could quickly find all the articles within that category or topic.
Many WordPress themes automatically display categories on the sub menus of your navigation area.

Whenever you make a new post on your WordPress blog, you have the opportunity to categorize it. Some people don’t bother, but SEO experts will tell you this is a big mistake.
Categories help your visitors navigate your website better. Some people truly depend on them to find what they need. Tags help too, but they’re a bit different. For instance, let’s say you have a vegetarian blog and one category is vegetarian foods.
You can post a blog post about a certain type of computers and place it in the Desktop computers category. But the tags you use might be the brand name of computers that it is, such as “Dell, Asus computers.”
The only bad thing about categories is if you over do it. If you have a long scrolling list of categories on your site, it can get confusing for your visitors. So it’s better to keep them trimmed back, and possibly create sub-categories instead.
Adding New Categories
There are two ways you can add a new category.
- Add a Category While Writing a Post
- Add a Category by Navigating to Existing Categories
Method 1 – Add a Category While Writing a Post
You can actually add a new category while writing a blog post.
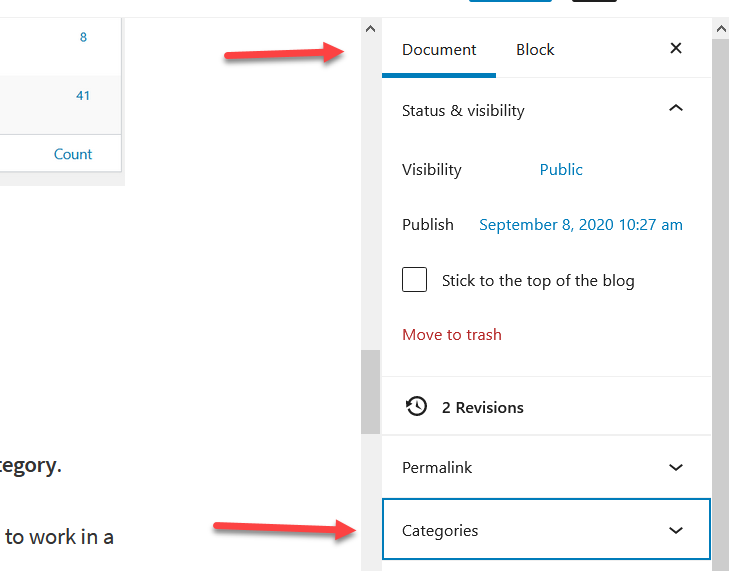
1. While on a post creation screen, click Document then click Categories.

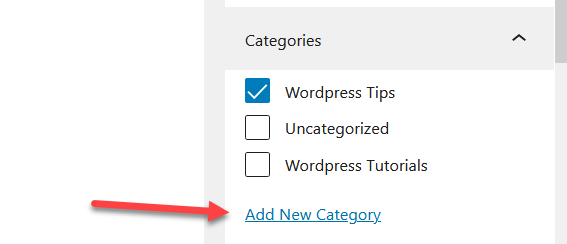
2. Click the Add New Category link.
Here, you can create a new category and give it a parent category if you want this to work in a hierarchy system, with sub-categories.

Method 2 – Navigating to Existing Categories
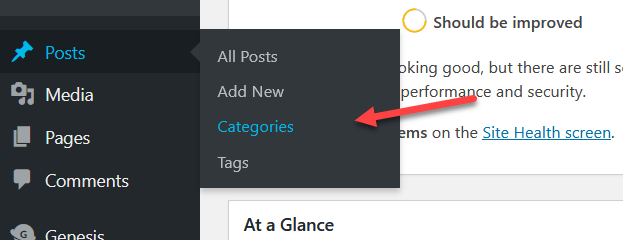
Another way to create and even edit categories is by navigating to Posts from the Main Navigation menu in your WordPress admin and then Categories.
1. On WordPress dashboard hover your mouse over “Posts” menu then click the Categories sub-menu.

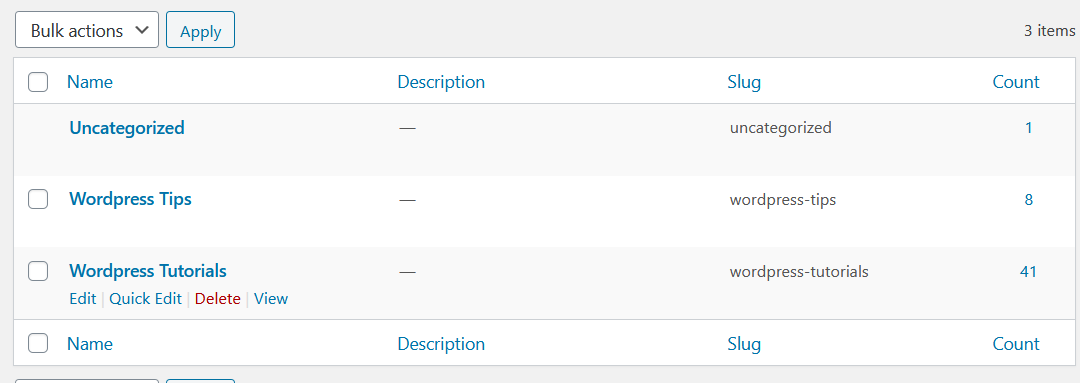
This takes you to the entire categories page so you can edit and manage all of your categories at once.
2. Enter your new category name then click the “Add New Category” button.

That’s it! You can now use this new category when posting new articles.

You’ll create the slug (which is the URL version of the category). Depending on the theme you’re using, you may want to add a description because some themes show the description while others don’t.
You can delete categories here too. If you delete a category, it doesn’t do away with your blog post. Instead, it just causes that blog post to return to the default category of “Uncategorized.”
